Monthly Archives: May 2010

Easy breezy PCRzy

One of our main goals for the OpenPCR project is to enable people to do PCR. With our first prototype we’re getting tools into the hands of people — with off the shelf parts, flexible design, and free control software.

What about enabling people to do PCR after they have the tool? What about helping them actually run their first reaction (does anyone get it right the first time?), their second reaction, or their 50th sample. How do we enable that?

I’ve broken “Make PCR easy” into 3 chunks:

1. Make mistakes!
2. Share mistakes!
3. Learn from mistakes!

Software
Sharing: twitter, facebook, human readable protocols
Troubleshooting: “Help!!” – heres a “troubleshooting” process for both newbies and veterans: https://www.bio.uio.no/bot/ascomycetes/PCR.troubleshooting.html

Other stuff
Since it’s a given that your first few reactions on a new machine won’t work, is there a standard curriculum used to train newbies? A sampler that opens your eyes to several PCR techniques?
Or a “is my PCR machine working correctly” wet/dry test? We are proposing that people build their own PCR machines, which hasn’t been done before.
First light!

Our first run with the OpenPCR machine just kicked off. We’re amplifying a SNP for bitter tasting. 2 samples each from Josh, Xia, and myself. One was made using a plastic swab against the inside of our cheek, the other made by putting a piece of Kim wipe against our cheek.

Kicked it off at 10:10 pm, 30 cycles to go, 94, 68, 84!

Weiden + Kennedy – Maker presentation

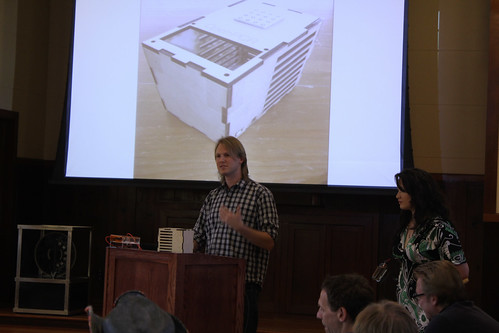
Eri and I journeyed up to Sausalito on Thursday to chat with a team of advertising managers from Weiden + Kennedy. We spoke alongside about 10 other amazing Makers, saw some reallllly cutting edge stuff. Everyone was wowed by the OpenPCR project, the Pearl Gel Box, and BioCurious, of course. Thanks for the opportunity, Make crew!

Pictures, courtesy of Rich Gibson: https://www.flickr.com/photos/rich_gibson/tags/wkmake/page4/

Pictures by Rich Gibson

Pictures by Rich Gibson

Notes to self

Assembling all the nuts bolts and hinges for the first time. Just keeping notes here on my Macbook

1. Drill holes can get ugly with this verneer wood from ponoko. If possible, have holes laser cut. If you do have to drill, drill into the surface that will be visible (i.e. the outer surface)…the wood on the inside will be splintered.

2. Hinge can’t open all the way because the screw heads bump against eachother

3. Need tiny nuts (or a taller lid) for the nut to fit on the bolt for the lid hinge. Otherwise there’s no room for the nuts. Glued in the bolts for now, not a great solution :\

4. Need 1/2″ bolts for the lid. 3/8″ is too short and 1″ is too long.

5. I’m able to mount the heatsink/fan. However, the challenges are that the height of this assembly needs to be somewhat exact, and very stable. Stability is doable if the size of the nuts lines up with expectations for the height. Otherwise you’ll need to find standoffs or just let the heat sink hang from the lid.

6. I’ve mounted the aluminum block. If the heat sink can be mounted securely, then insulation can be used to hold the heat sink in place, at least in the short term. We’ll have to test this out and see if it holds long term. IN the meantime, the search for brackets continues.

Nuts and Bolts

All right, lots of presents arriving from USPS and UPS this week. Just went to OSH and Fry’s today, roamed the aisles and grabbed whatever I thought might be useful this weekend, a bunch of floppy drive cable connectors, heat shrink tubing, atx power supply extension cable, silver thermal adhesive, brackets. Ponoko final cases arrived :) The bamboo is a real beaut, a very dark blonde, have to see it in person. Looks like I messed up on the design of the lid, one part overhangs and I’ll need to cut it off for everything to fit together. H bridge holes look good.

Final word is — I can’t believe what a struggle it has been to find brackets to mount the aluminum block to the case. The smallest brackets I could find in my initial search were gargantuan 1″ ones, and after Home Depot, vark.com, amazon, google, bing, ebay, calling 3 stores in SF, walking to my local hardware store, Fry’s, lastly I went to OSH and found 3/4″ ones. Still too big, but might be able to be made to work. Definitely an interesting piece of the project for me, finding a lot of the sexier components was easy, even having the aluminum block made wasn’t too exciting. But finding brackets — impossible!!

The final stretch

Met up with Josh today in Saratoga. Checked everything out, sure is wacky how the nuts and bolts are the hardest part, and the sexy cool components were relatively easy to find (peltier, cpu heat sink, ponoko case). I spent Friday night and Saturday day looking all over for small angle brackets, to no avail. I found some 3/4″ plastic ones on a robotics website, so we will have to make do with those even though 1/4″ would be ideal. At least the plastic ones we can drill our own holes, these steel ones from Ace were impossible to drill through!

We focused on the lid today, which has turned out to be quite a tricky component, both the heating element and mechanical specifications of the lid are complex. The lid has to be in full contact with each of the tubes, even if someone is using a different size tube from what Josh and I are using. The lid has to heat up to 100C and not melt itself or the casing. More to come!

Ordering all the components for my OpenPCR machine tonight. Placing the order for our revised Ponoko cases as well — removed 1/3 of the vents, redid the hole for the LCD (the spec I had was totally wrong…no good spec on adafruit so I just measured it by hand), and added holes so we can mount the H bridge.

Ponoko – my first experience

High hopes for ponoko as a prototyping tool. It is cheaper and faster than the other options I have — i.e. 1. cutting pieces myself (time consuming) 2.going to tap plastic (limitation on cut shapes) 3. hiring a real fab shop ($$$). Their customer communication is *beyond excellent*.

For prototyping, their turnaround time is up to 28 days for normal orders. Ponoko Prime, a $40 service ponoko offers for faster (1-2 weeks) turn around time is a must have if you’re in a rush.

I took my OpenPCR case to a fab shop — they said that my ponoko case looked really and wondered how much I paid for it. They said they would’ve charged $400 if I had them do it.

Here’s my detailed experience:

April 14th — uploaded OpenPCR design, picked bamboo as my material, and placed my order.  Wanted to test it out by April 23rd.

April 15th — after reading ponoko’s policies, April 23rd didn’t seem like a reasonable expectation. Ponoko straight up says to expect a 28 day turnaround on all orders. Josh@Ponoko recommended I sign up for Ponoko prime ($40) to speed up my order to 11-15 day turnaround, which I did.

April 21st — update from Josh@Ponoko. Won’t hit April 23rd, bamboo is out of stock and has not arrived, no ETA from supplier.

May 3rd — talked with Josh@Ponoko, bamboo still out of stock, this is pushing our schedule too far. Josh said I could pick another material and they could have it to me by the 5th (2 days!).

May 5th — 21 days after order, received Birch cutouts. Yipee! Laser cut birch smells awesome!!

Happy to answer questions. I am excited about using Ponoko again.