Category Archives: Industrial Design

It Lives

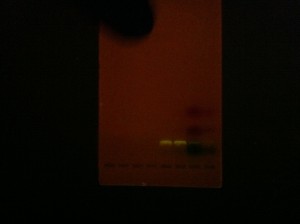
The below is a gel showing PCR reactions from the final OpenPCR prototype that will be used for our kit production. This experiment was done to validate various polymerases rather than test OpenPCR, but thought you may want to see it. Lane 1 at the right is a control with no polymerase. Lanes 2 – 4 show amplification of a ~1kb amplicon with different polymerases/salt concentrations. Lanes 3-4 have a different loading dye, but pay attention to the fluorescent DNA band (imaged with GelGreen / Invitrogen Safe Imager).

OpenPCR PCR machine results

This is just an early glimpse – when we release the final machine kit, we’ll include a gel image with well-by-well results for an identical reaction. That release is thankfully getting closer – over the weekend Tito and I tested a prototype with full mechanical assembly and got excellent results, so we’re just getting the final pieces into production. Stay tuned for the official release date!

OpenPCR at the Grenswerk Art Festival (Enschede, the Netherlands)

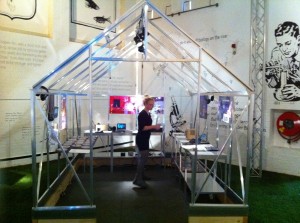
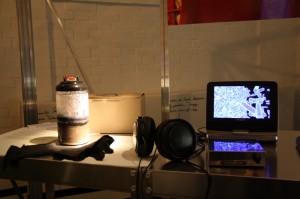
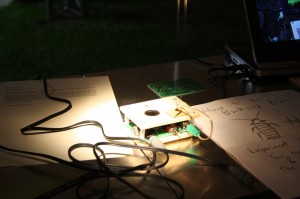
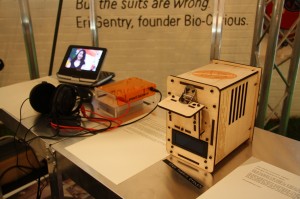
A while back, we mentioned the excitement of sending an OpenPCR off to the Presidential Commission on Bioethics. After all that hard work, you might think our prototype would come home for some R&R. Instead, it headed onto Amsterdam, the Netherlands, where it was featured in an art show in Enschede by the Joris Laarman Lab, along with lots of other cool experimental devices. Congrats to the Lab, and Anita and Nora for their hard work. Here’s a few shots from the exhibit. Enjoy!

OpenPCR PCR Machine

The Exhibit - check out the cool images painted on the walls!

I recognize those pictures from the DIYbio flickr stream

Microbial Fuel Cell

Spiker Box

OpenPCR PCR Machine

OpenPCR and the Pearl Gel Box

Great design (for a PCR machine or anything!)

Hi all,

We get a lot of wonderful comments from all of you on the OpenPCR blog. I wanted to highlight one recent post that I really liked. Tom Benedict posted the following rules of thumb on our Dieter Rams 10 Principles for Good Design post:

- Good design uses as much commercial off-the-shelf as possible. (e.g.
don’t re-invent the screw standard if you can use screws from the
hardware store or McMaster Carr.)

- Good design provides for “getatability” of the parts. This term was lifted from an article in American Machinist from the early 1900′s. (Corollary – If you design one part to be almost impossible to get to, chances are it’s the part that will break first.)

- Good design assumes the thing will have to be taken apart. (e.g. If
the faceplate of an electronics enclosure has all the lights, switches,
buttons, and knobs, and the electronics themselves are bolted to another
part of the enclosure, provide connectors so the two parts can be
separated when the enclosure is taken apart.)

- Good design follows function. (e.g. If the thing being designed needs
to be able to be stacked, don’t make it shaped like an Airstream
trailer.)

- Good design maximizes bulk purchasing and minimizes spares. (e.g. If
it requires twenty push button switches, use the same push button switch
in every case. You reduce costs through bulk purchasing, and only need
one or two spare switches to cover every switch on the device.)

- Good design is easy to make. (e.g. It is POSSIBLE to machine a
90-90-90 sharp inside corner in a block of metal, but it’s a real pain
and will cost a fortune. If a rounded corner will work just as well, use
the rounded corner: it’s easier to make.) Talk to your manufacturer.
They’ll know the tricks for making a design cheap and easy to build.

Thanks, Tom!
Tito

Case Study: Rapid iteration with hardware

From Eric Reis’ blog, written by Ronald Mannak. (Thanks to Josh Perfetto and Matt Bertram for recommending it!). Excerpt:

The prototypes
The next day we started building the first prototype to see if the sensors actually behaved like they were supposed to, and to see if we could measure the sideway movements. The prototype was crude. Joris taped sensors on his arms with duct tape and started drumming in the air with wooden drum sticks (that did not contain any electronics). We connected the sensors to a seven year old pc with an Arduino-like interface that ran a simple drum program we developed. The results were amazing. It actually worked.

https://www.startuplessonslearned.com/2010/10/case-study-rapid-iteration-with.html

There is certainly a lack of good information on the business of hardware. Hardware sometimes feels like a dark art compared to Software where you can supposedly RentACoder at the drop of a hat, and oh just AB test your way to being a billionaire.

Got a favorite hardware blog? Give them a shout out here, I would love to hear about  them.

Tito

The heated lid

Hi rock stars,

Many thanks to the thoughtful, smart suggestions in Name that component!, from Kyle, David, AdamT, Kyle@otyp, and Ben. All together, we worked through the panini/linkage idea, browsed camera shops to find ball joints, and really set out to get the best design that’s easy to build. That said, it can be impossible to find off the shelf parts to bring a new design to reality. More specifically, I’ll say that my current source for searching (McMasterCarr) has lots of really *big* things, lots of door hinges or refrigerator hinges, but not so much in the *small* side of things. Is there a good source for electronics-sized components that you like? Digikey and Mouser stick to electronics components, what I’m wondering about is a digikey+mcmaster love child. Of course, this will be helped in the near future with the rise of 3D printing and Makerbots, where small batches of custom parts start to make sense. Maybe a Makerbot is in my future.

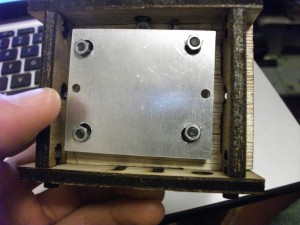
The best design turned out to be the most simple one, suggested by AdamT — 4 springs pushing down the aluminum plate, the whole assembly floats on 4 bolts. The lid gets locked down into a low position, and the springs/hinge float around as needed. I prototyped it up, showed Josh, and we like it. We’re going to be mounting a heater and really testing it out over the next few weeks.

2 opportunities for improvement are:

  • how to lock the lid in the “down” position (magnets would be great, a bolt with a thumb screw is more realistic).
  • Secondly, the nuts/bolts in the picture are metal and heat up a lot. I’m planning onfinding nylon screws (M3), though their operating temperature is 85C (the lid is heated at 100C to 110C, the melting point of nylon is over double that). Suggestions welcome :)

(Skinny shoulder screws/binding barrels would be nice so that the plate can slide easily up and down except I need 2 nuts on each bolt, one nut to hold the bolt in place at its base, the other nut to keep the aluminum plate/spring on. A bolt with threads at the beginning and end but not the middle would be good.)

Thank you to everyone!

Tito

Bottom view of the heated lid. 4 nuts show where the springs are

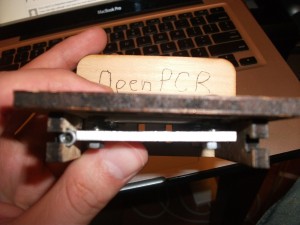
Took off the front side of the heated lid so you can see the assembly inside. Springs and bolts hold the aluminum plate in place

Re: Treat your machine/pcb/acrylic/laser shop professionally

Update: 9/25/2010 to https://openpcr.org/2010/07/treat-your-machine-shop-professionally/

Good comment from mo – spread the love around. I want to point out that the relationship with your machine/PCB/acrylic/wood shop can be challenging! It’s important but not necessarily easy!

If you can’t meet in person it’s tougher to build repertoire over email or telephone, no matter how charismatic you are. And though I’m usually close to my email, people in shops are on tools and machines most of the time. A phone call is a lot quicker and more personal, but conversations on the phone often lead to miscommunications and frustration. What’s worked for me is talking on the phone, and then summarizing in a follow-up email immediately afterwards. Other points of friction I’ve found are in file formats (I was in Bangalore, India, bouncing between coffee shops and I just couldn’t get the right program in order) and computer use  (for instance a shop that insists on printed 2D drawings of a nice 3D CAD file you struggled to put together…), and one guy that always returned calls around a week later.

Experience says: lavishly praise shops you come across when everything goes smoothly.

Right now: I’m working with a shop called OharaRP (out of Dayton, Ohio) on a PCB board and they kick ass!

Tito

I hate glue (feat. Nodes)

New cases arrived this week, acrylic and wood!

Nodes rock!

That is, when you design them correctly. Working with birch wood, I added 1 simple node on each of the notches for the lid parts. The parts “snap” together, and glue doesn’t even seem necessary.

With 1/4″ acrylic, I used the exact same sized node as with the birch which didn’t work out so well. Acrylic is a lot less flexible than wood. I ended up just sanding off the nodes on the acrylic parts to get them to fit together correctly. (I’ll read up on what size nodes to use with acrylic, or comments are appreciated!)

This was my first time designing a case and immediately having it made with 2 different materials. The design was for birch, and I attempted to change the design for acrylic which is a good bit thicker. I made the holes for the notches wider which was a good first step. What I skipped was making the parts themselves a bit shorter to accommodate for the thicker material.

One other revision to make is 4 sets of holes/T slots don’t line up perfectly. I’m not sure why they got a bit off (Update: the tooth on the bottom edge was a few mm off, which pushed the holes off), but it’s definitely something to fix. I hacked the birch case to get everything to fit.

Down to business, the T-slot design is sturdy, and assembly is straightforward. With the T-slow and notched teeth, glue will no longer be necessary! I also found that rounded corners on laser cut wood make a big difference in durability. In my experience, sharp corners easily chip, wear down, and start to look less than best. Rounded corners are more durable and can take a bit more wear and tear.

Next up is the important step — when the flat aluminum parts arrive from Ponoko NZ we’ll test out the heated lid.

Both the acrylic and birch look great! Thanks Pololu and Ponoko :)

Inspired by: https://blog.ponoko.com/2008/11/03/how-to-create-better-nodes/

Heat sinks arrived

All right, went and picked up the heatsinks at the UPS office last night. Broken them open while sitting in my car and made a couple quick judgments. Remember, my concerns are:

1. big enough surface area for the peltier
2. cost – $20 to $30
3. overall size and weight

The MassCool, while bigger in all dimensions, just isn’t big enough for the 4 cm square peltier. We would still need an aluminum plate adapter between the heat sink and the peltier.

The Titan on the other hand has the perfect sized surface for the 4 cm square peltier. It’s MASSIVE though.

I’m designing a quick prototype box today to send of to Ponoko. My focus is getting the case made to test out the heated lid. I’ve got a design using a spring hinge + thermal pads that I think will be easy to use and prevent condensation.

I’m also making the overall dimensions a lot bigger so they can fit any components we want to test out. Overall, it’s going to be 7″ tall, 7.25″ long, and 4.7″ wide. Our original case was and 5.7″ tall, 6.7″ long, and 5.4″ wide so this is test is quite a bit bigger. I’m going to test this out with both wood and acrylic, using a bolt design (the same one as the Makerbot) instead of glue. Glue is best for permanent slick looks, but since we’re  this is a hackable kit, bolts are easier to take on and off.

I’m also adding:

  1. Enlarging the hole for the aluminum block (4 cm square) to 4.4 cm square, to accommodate a layer of insulation around the block.
  2. Power port for the MicroATX ATX
  3. Front vents for the MicroATX so that we can test it internally

Dieter Rams 10 principles for good design

Any designers out there who want to make biotechnology that is welcome and accessible?

https://www.designsojourn.com/dieter-rams-and-his-10-design-commandments/

• Good design is innovative.

• Good design makes a product useful.

• Good design is aesthetic.

• Good design helps us to understand a product.

• Good design is unobtrusive.

• Good design is honest.

• Good design is durable.

• Good design is consequent to the last detail.

• Good design is concerned with the environment.

• Good design is as little design as possible.

Make it hot

A good discussion on the OpenPCR heated lid over at O’Reilly Answers:
https://answers.oreilly.com/topic/1641-silicone-heaters-for-openpcr/page__p__3131&#entry3131

We’ve been thinking a lot about the heated lid, and have had some great ideas suggested.
Windell Oskay from Evil Mad Scientist Labs suggested actually making a custom PCB printed with copper trace to form a heater. What an awesome idea, definitely want to try it out.

I also found this great “wire making” tip on the EMSL site, looks good for fixing the ‘rats nest’ of wires we run into from time to time and thought I would share: link

Tonight Josh tried out a simple $16 peltier to do our heating and it worked, so we’ll go with that for now and focus on getting the mechanical design down. The heated lid must make flat contact with all the tubes, so a double hinged lid and some sort of downward pressure (magnets? latch?) are needed.

Tito